Showing posts with label custom painting. Show all posts

Monday, March 24

I'm blue, da ba dee, da ba die

I've got little art lesson for you today that I loved teaching to my middle & high school students. A PORTRAIT! And probably the easiest one ever. Let's dive in, shall we?

Here's a word for you - monochromatic. It means one (mono) color (chroma), so anytime you're going with this color scheme, you just use all different shades of a single color. The main goal for this lesson was to teach my kids about value, which describes the lightness and darkness of a color. We made really fun Warhol-esque self-portraits based on photographs the kids took of each other in class. Today I'm going to show you how to create this for yourself! You can go with a single color for the entire thing, or for most of it, adding in some contrasting colors just for fun (like I did).

The following are some screen shots of the photo editing process that I completed with PicMonkey. It's a completely free photo editing website, though you can pay a little extra each month (I think $4?) to get some "Royale" features - which I do, because I use it all the time. You can do the same thing in Photoshop or just about any other photo editing software. 

Start with a photograph (preferably digital -- if it's a print, you can always scan and import it into your computer to manipulate). Here's the photo I started with:
First, I cropped my photograph into a square, because my canvas is a large square. Though this step is not essential, it gave me a better visual of how my final product would turn out.
The next step is to edit the photo with the Posterize tool. This breaks down the photo into flat "layers" of color. You can adjust how many layers, how detailed you want everything, etc. So play around with that for a little bit until you're happy with your image.
I wound up with 17 "layers" or "Number of colors" as labeled by the program, with 48% "Detail".
Next, I used the Black and White tool to simply make my photograph b/w and less chaotic for my own sake when transferring the image.
Once totally happy with my image, all that was left was save and print!
I printed my image to be about 4x4 inches, because the viewfinder on my projector is small. This really doesn't make a difference in the final size. Once it was on paper, I stuck it under my projector in a dark room, lined it up how I wanted on my primed canvas, and started tracing. I opted to throw the image off to the side a little bit for some asymmetry.
Keep in mind that the number of colors you have will have an impact on how detailed your final image is, because more layers = lower contrast between each layer. In other words, some areas may be a little tricky to transfer if you have a lot of colors to work with. Even though the program told me I had 17 colors, I actually only used 8, because I decided not to transfer the background, and simplified a few areas on my own.
Here's the important part: when you are tracing the image, you have to remember to outline each of the little shapes or "layers" of color, in order to break it up into values for painting. 
Once it's been traced, double check by putting your canvas next to your image and make sure you got every little shape. (Some free handing may be required.) Yes, it will look weird.
The next thing you'll do is basically create a giant paint-by-number for yourself. I assigned each shade a different number - 1 = lightest, then going from there. Label every shape with its corresponding number, depending on the shade it's supposed to be based on the photograph. Then, when you paint, you'll know your total number of values/shades to mix (I had 8) AND you'll know just where to put them. Always keep the photograph close by while you're working, for reference.
I wanted my main color to be blue. With 8 shades to create, I actually used black for the darkest (number 8) and white for the lightest (number 1), so I had 6 shades of blue to play with for the in-between. 

All you have to do now is mix up paint and start putting your colors where they belong! This is really easy, just time consuming! The hardest thing about this step is trying to look past what you want the person to like to just painting shapes. It really is best to just focus on the painting piece by piece, and it turns out better in the end. Here's some photos of my work, after each "layer" or color was added. You can really see it start to come together as the photos progress! Please forgive the horrible photo quality. I was painting late at night, and the best way to photograph was with my flash on!
After a long night, I completed all of the face and crashed in bed. The next day I would finish.

I hesitated a little before painting the frames of his glasses just another shade of blue. I kind of wanted a fun pop of color, and with further review (i.e. hubby's input), decided the frames needed to be a different, bold color. So I went with oranges/reds for the shades. See what I did there?
When it came to the background, I originally planned to paint this another color, so I tried lime green. I snapped these photos with my iPhone as I tried out some different options.
Lime green: not loving it. It broke the image up too much and the face just looked weird all piecy on top of a solid background that didn't quite look right. You may like it, but I wasn't crazy about it. 
 
So I went with one of the blues from my palette.  
Not enough contrast - it was all bleeding together.
I needed something in the same color family, but a color that would still offer contrast without being too stark. So I went with a deep bluish aqua, and it was perfect. After that, I did some touching up, and voila! It was done. 
Right now it's hanging in the playroom (and looks smaller in this image than it does in real life - the canvas is 36"x36"). Eventually I'll paint a portrait of littlest man and put it on the same wall.

What do you think?! Would you be brave enough to try this for yourself? Feel free to ask any questions about the process in the comments section below. And if you try it for yourself, send me pics!!
Thanks for stopping by today!


Wednesday, June 5

a classic.

Now I'm finally able to share with you the painting I've been working on lately! I had to wait because it was a birthday gift for my husband, which he received yesterday!

My dear is working on restoring a 1965 Chevrolet Impala (total gangster!). He is SUCH a car guy. When I say "car guy" I mean this man eats, sleeps, breathes, and dreams cars. Not only are cars - and anything with a motor, for that matter - his passion, but it's his hobby AND his profession. You can pretty much bet that at any given moment he will either be thinking or talking about cars. I love that his passion is so clear and defined. Do you know people like that?

When he was younger, he spent most of his free time doing "car stuff" with his dad, which sometimes included restoring/working on classic cars. He's always wanted to work on one of his own, but couldn't figure out just which one to pick (How do you pick??). He liked old Impalas, so when the opportunity came along for him to purchase and restore one, he jumped. He brought this beaut' home early January of this year.
three generations of "car guys" 
He really has his work cut out for him on this tank. He brought it home on a trailer because it didn't even run! What he originally thought would be a "fun little side project" has turned into a complete restoration & overhaul. I'm still so happy for him because it's a stress reliever and something he loves. I get updates and see photos of the progress almost daily (he's keeping it at his shop). We can't wait to go cruisin'!
aw, cool, dad!
That afternoon, I was snapping photos left and right when I captured this image, which I knew immediately that I would turn into a painting. 
So when his birthday rolled around I knew just the thing to do! I went to Staples and had them blow up the image in a black and white "engineer's print". Then I carefully adhered and wrapped the image around the 24x36" canvas to use as my guide. Easier than drawing, right? I was so excited about this I even bought new paints. I've always used the basic paints but I invested in some heavy-bodied acrylics for this project (and any future projects) and I'm so glad I did. The coverage and texture they offered was perfect. I had originally carefully gone over all the lines, making everything super smooth and accurate, and then decided it would look better with a little more "edge" to it. So I pulled out the palette knife and started making really bold changes to it, including some splattering and some more "harsh" lines and strokes to make it more modern and "pop-art"-ish. I spent several afternoons and evenings secretly working on this... so without further delay, here it is!
 
Needless to say, he LOVES it. I painted this for his office at work but somehow knew it would probably never leave our home. Now it has found its place in his "man room" aka our media room. It's going to look amazing in there with the room all pulled together! 
I'm so proud of this piece, but especially that I was able to combine our two loves into one project and help his car really come to life on this canvas.

Thursday, July 19

sneak peek

I want to give you a sneak peek until I can post more photos of my latest custom painting!
It's got a beautiful scripture included!

The reaction?
We did get the painting and LOVE IT!!  It was exactly what I invisioned in my head.  You did an excellent job!!  I'm trying to wait to give it to her, but it's tough.  I can't wait for her reaction when she sees it  :)  Thank you so much for painting that for us.  It is such an incredibly personal gift.  I might be contacting you again in the future for a few Christmas or birthday gifts! 

Custom paintings are one of my absolute favorite things!! Ever considered ordering one of your own? 

Stay tuned for more photos of the finished product!

Friday, June 1

sacred donations

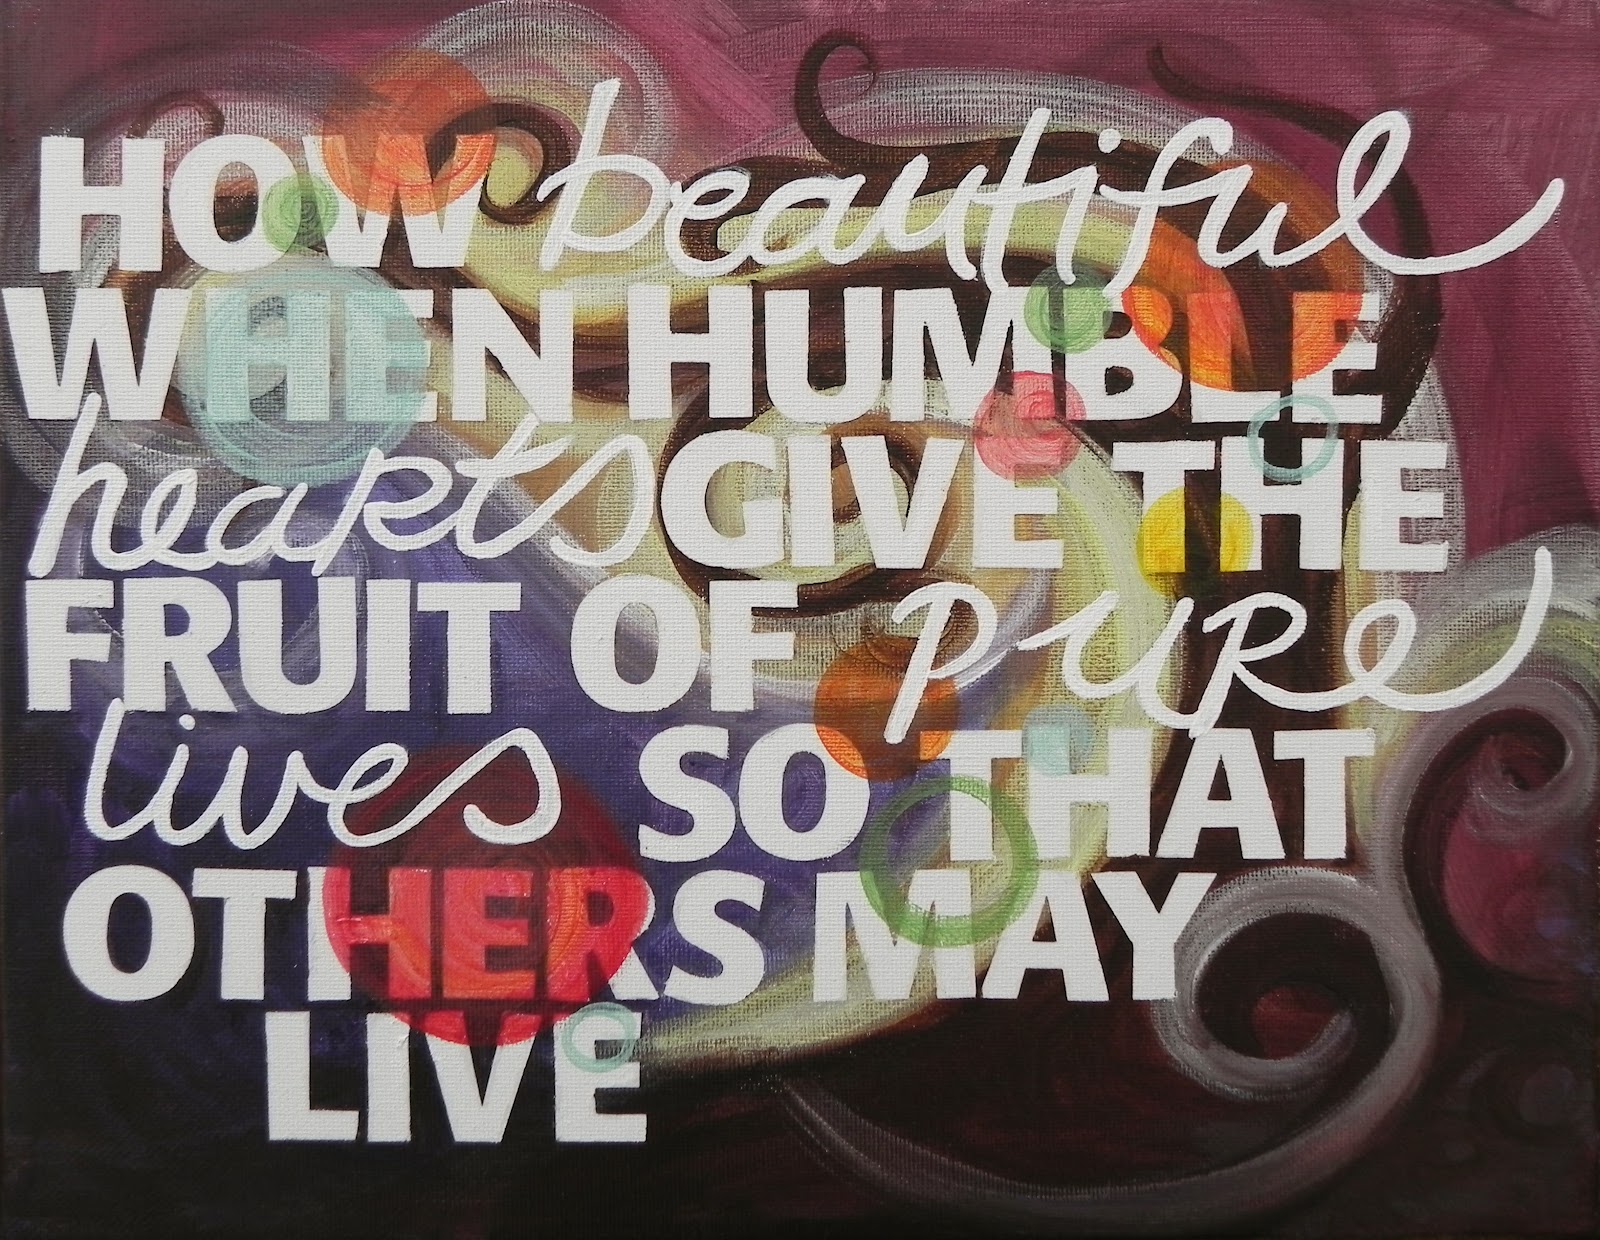
Hey friends! Well, I'm finally getting around to posting the photos of my painting donations to the Sacred Selections Auction. The first one here was purchased through the live auction portion of the evening, and I was excited to see the bidding go so high! It is now proudly displayed in an adoptive family's home :)
"Sacred Love"
the Sacred Selections logo!
There was a bidding war in the silent auction for these next two between two families. One family won both but then wound up giving the other family the one they really wanted, which I thought was sweet. Now I'm working on even more for one of the recipients! I'm so excited :)
"Beautiful Hearts, Pure Lives"

"Precious in His Sight"
Love 'em? Prints coming to my etsy in June!


Thanks for stopping by!

Tuesday, September 27

let it be

Here's a look at the painting inspired by the song, for a very special person in my life (who happens to LOVE the Beatles)...

I did this painting for my father-in-law for his birthday. My mother-in-law told me that he would really like a painting to hang in his office, so I knew it had to be special. This song (and the Beatles, in general) have been in his top list of favorites for a long time and hold special meaning to him. I knew since this was for a man that I should probably stay away from swirly colorful trees - haha - so I decided to try something new and little more bold & graphic.

I decided to make this look a little aged with the surface treatment and use font that might look like it was from and old sign or something. I took the words right off the edges, as you can see in the image above. I'm SO loving the way it turned out! I have had some other requests to do some paintings with a lot of text and I think I will probably go in the same direction with them. 


 Now I'm off to tackle my long list of fun projects for the week! Thanks for stopping by today!


When I find myself in times of trouble, mother Mary comes to me, 


speaking words of wisdom, let it be. 
And in my hour of darkness she is standing right in front of me, 
speaking words of wisdom, let it be. 

Let it be, let it be, let it be, let it be. 
Whisper words of wisdom, let it be. 

And when the broken hearted people living in the world agree, 
there will be an answer, let it be. 
For though they may be parted there is still a chance that they will see, 
there will be an answer. let it be. 

Let it be, let it be, ..... 

And when the night is cloudy, there is still a light, that shines on me, 
shine until tomorrow, let it be. 
I wake up to the sound of music, mother Mary comes to me, 
speaking words of wisdom, let it be. 

Let it be, let it be, .....