
Friday my FIL and I tackled the "let's finally build this king size headboard" I've had on my list since, oh, last May. I've tossed several ideas around but ultimately decided on a very simple upholstered design. There are tons on the market to choose from, and many beautiful options, but unfortunately they run in the $400 and up category, and that just doesn't work for me.
> Cue the why buy it when I can DIY it?
Scouring the internet for some inspiration/instructions was easy. Pinterest is the mother ship of all things home decor DIY, so I found this simple tutorial from theEverygirl and went with it. It seemed like the easiest and most cost-effective of several options I had found. I'm totally not taking credit for her design, just showing you how I implemented it myself.
 |
| via theeverygirl |
- I went with her simple design using 1/2" sanded project plywood and some 2x4"s. The only thing I changed was adding a middle vertical brace/support, because at 78" wide, our board needed a little something extra back there to help hold it together.
- We had my friend at Lowe's cut the plywood down to 78x30" at the store, to make it easier to transport home and save us some major messes by avoiding getting out the table saw. (At 30" high, the plywood comes down a good six inches below the top of our mattress. The width extends just a tad on the sides of our mattresses.)
- Our overall height of the headboard (from the ground up) is 50", so the vertical supports are just that length. We cut them first, then screwed them into the plywood from the front side.
- Then we measured the horizontal distance between, for the top supporting brace. We did this after attaching the vertical pieces to make sure we got a precise fit.
- Next, I measured down from the bottom of the top (horizontal) piece to the bottom of the legs, and cut that piece for my middle support. Then I just measured in the two bottom horizontal pieces, cut them, and screwed them on as well. In the photo below, you can see our construction of all the pieces. All of the 2x4s were screwed in with wood screws from the front side.

- Cutting and screwing these pieces in took me about 15 minutes, tops. It helped to have a set of man hands to help me lift and flip things when needed.
- After framing out and piecing together all the wood, I flipped it over and used spray adhesive to attach 1/2" cushion foam to the front side, lining it up with the very top of the headboard and trimming off any extra on the sides. This left about six inches at the bottom with no foam, but it was going to wind up below/behind our mattress (AND was wrapped in batting) so it didn't matter.
- We then carried the entire thing inside and placed it carefully onto the ironed fabric and quilt batting I had already laid out on the floor. I made sure to have enough fabric on all edges to go around the sides, to be stapled on in the back. Lining everything up took a few minutes, but once it was ready, my staple gun and I went at it. I trimmed up batting as needed, so it didn't poke out from behind the fabric on the backside and look messy. You know, for the wall that looks at it.

- I purchased the 1/2" cushion foam and twin-size quilt batting from JoAnn's, and it was my lucky day because both were 50% off. I doubled up on the batting for a little extra cushion. For the fabric, I actually used a curtain panel I fell in love with a few months ago walking through Lowes. The panel was the perfect size, and at $25, it was cheaper than buying several yards of upholstery fabric. Plus I already was already obsessed with it. Another plus? All the edges of the fabric were finished with a seam, even the bottom hem I took out to give me another few inches to wrap around.
- One of the little details I paid attention to was the slight pattern in the fabric (it's like a twill/tweed) and made sure I pulled it around to the backside very tight, yet evenly. I pulled one little part around, stapled it in, then measured how far in the fabric went on the wood. I drew a line across the wood and made sure I didn't pull any of the other fabric on that side past that point. This helped keep the pattern from getting wavy or uneven. I just repeated this on all sides (except the bottom), and used more staples than I care to count. The corners can be difficult, but I just did a little gift wrapping trick to line things up.

- I had to cut the fabric in at angles in the corners around the insides of the legs (which wouldn't show), and then stapled those pieces smoothly and securely to the legs (the outer two legs show just a tad when on the bed, and they are completely wrapped). Then I pulled the bottom of the fabric super tight, and put in my last few rows of millions of staples. Attaching the fabric probably took the most amount of time out of our hour, but it was simple.

- All that was left was to attach it to the bed frame using some nuts and bolts, which only took a few more minutes!
 It barely peeks above our Euro pillows on our bed, and it's perfect!
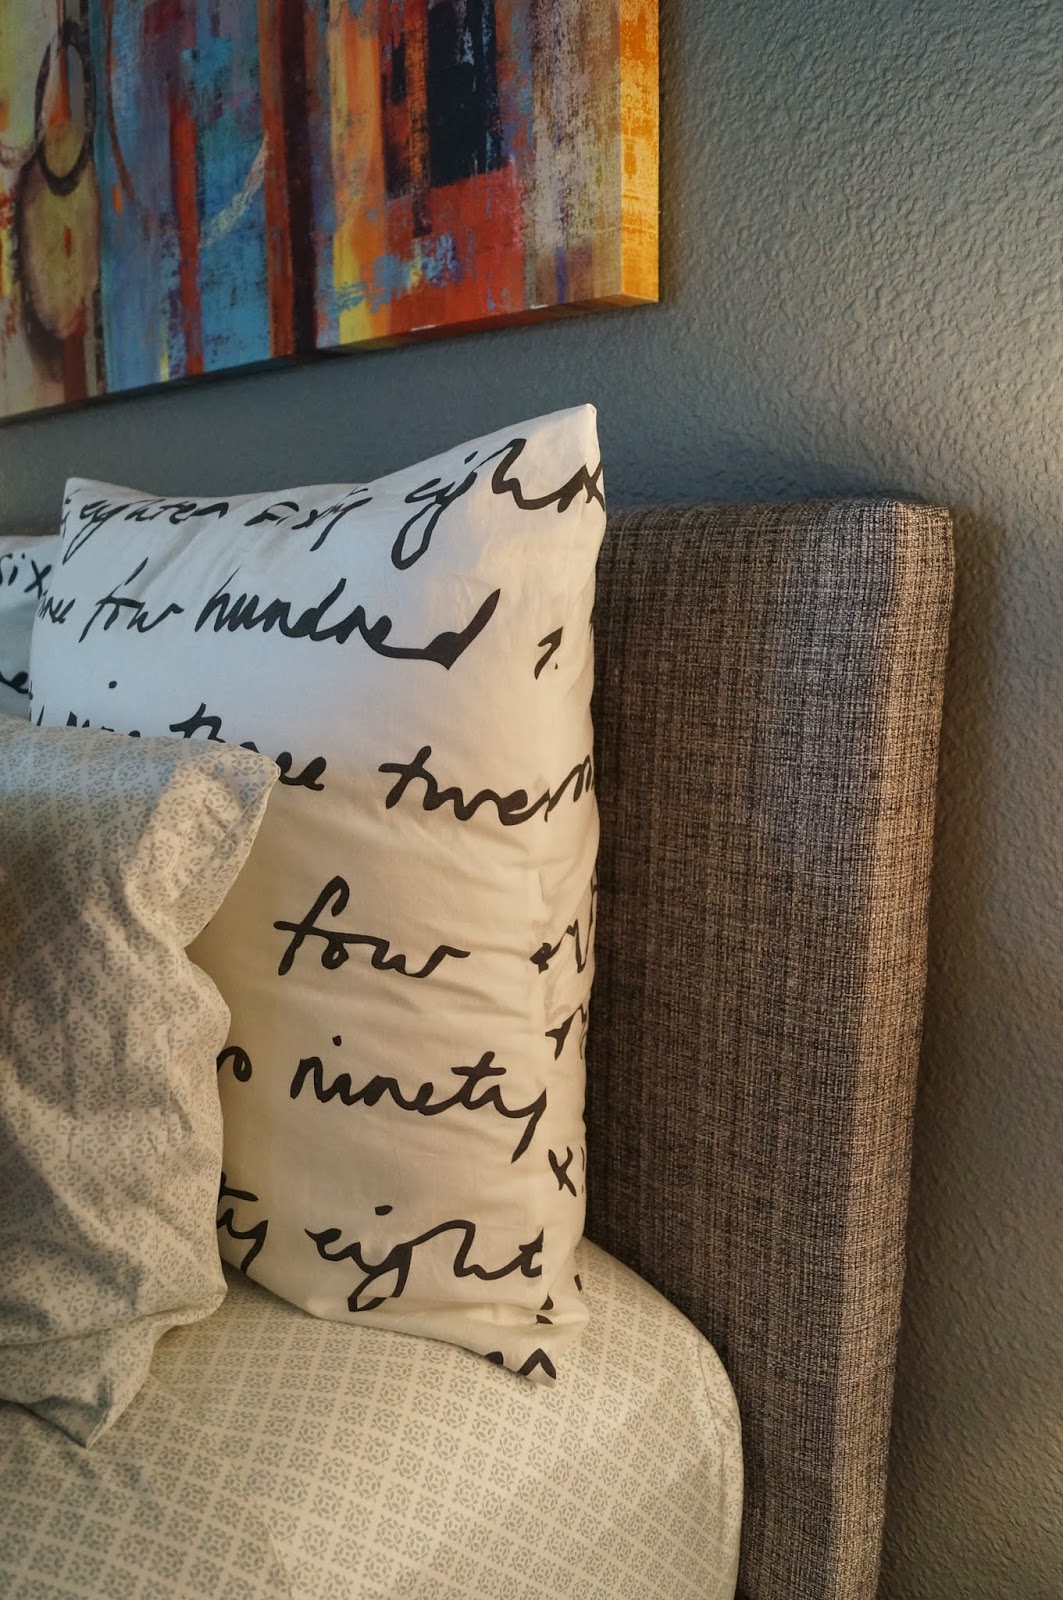

Cost breakdown:
1/2" thick x 24" wide foam: $11.99 per yard x 2 1/4 yards = $26.98, 50% off = $13.49
twin size quilt batting: $14.99, 50% off = $7.49
2x4"s (each 8 ft long): 4 @ $2.85 = $11.40
15/32" sanded project pine: $24.97
curtain panel: $24.97
spray adhesive, wood screws: already had
bonus wood smell in my bedroom which helps me sleep at night: free
bonus wood smell in my bedroom which helps me sleep at night: free
Total project cost: $82.32
This is something anyone could easily tackle in an afternoon! Now we have a grown-up-looking bed, and no more pillows squishing down between the wall and the mattress! Score!

No comments:
Post a Comment
Thanks for visiting my blog today!