pre-primed trim in desired width, pattern
paint
miter saw
level
liquid nails
caulk
caulk gun
blue painter's tape
an extra set of hands
possibly some spacing trim (I'll explain)
possibly some spacing trim (I'll explain)
Thoughts:
We used 3 1/2" pre-primed trim pieces from Lowes and some liquid nails to do the deed. I bought 6 pieces of 8' trim to complete TWO mirrors. I was able to get both side pieces (42") for each mirror from one trim piece. The other four pieces were for the tops and bottoms of each of these mirrors (one measured 58" wide, and the other 65" wide).
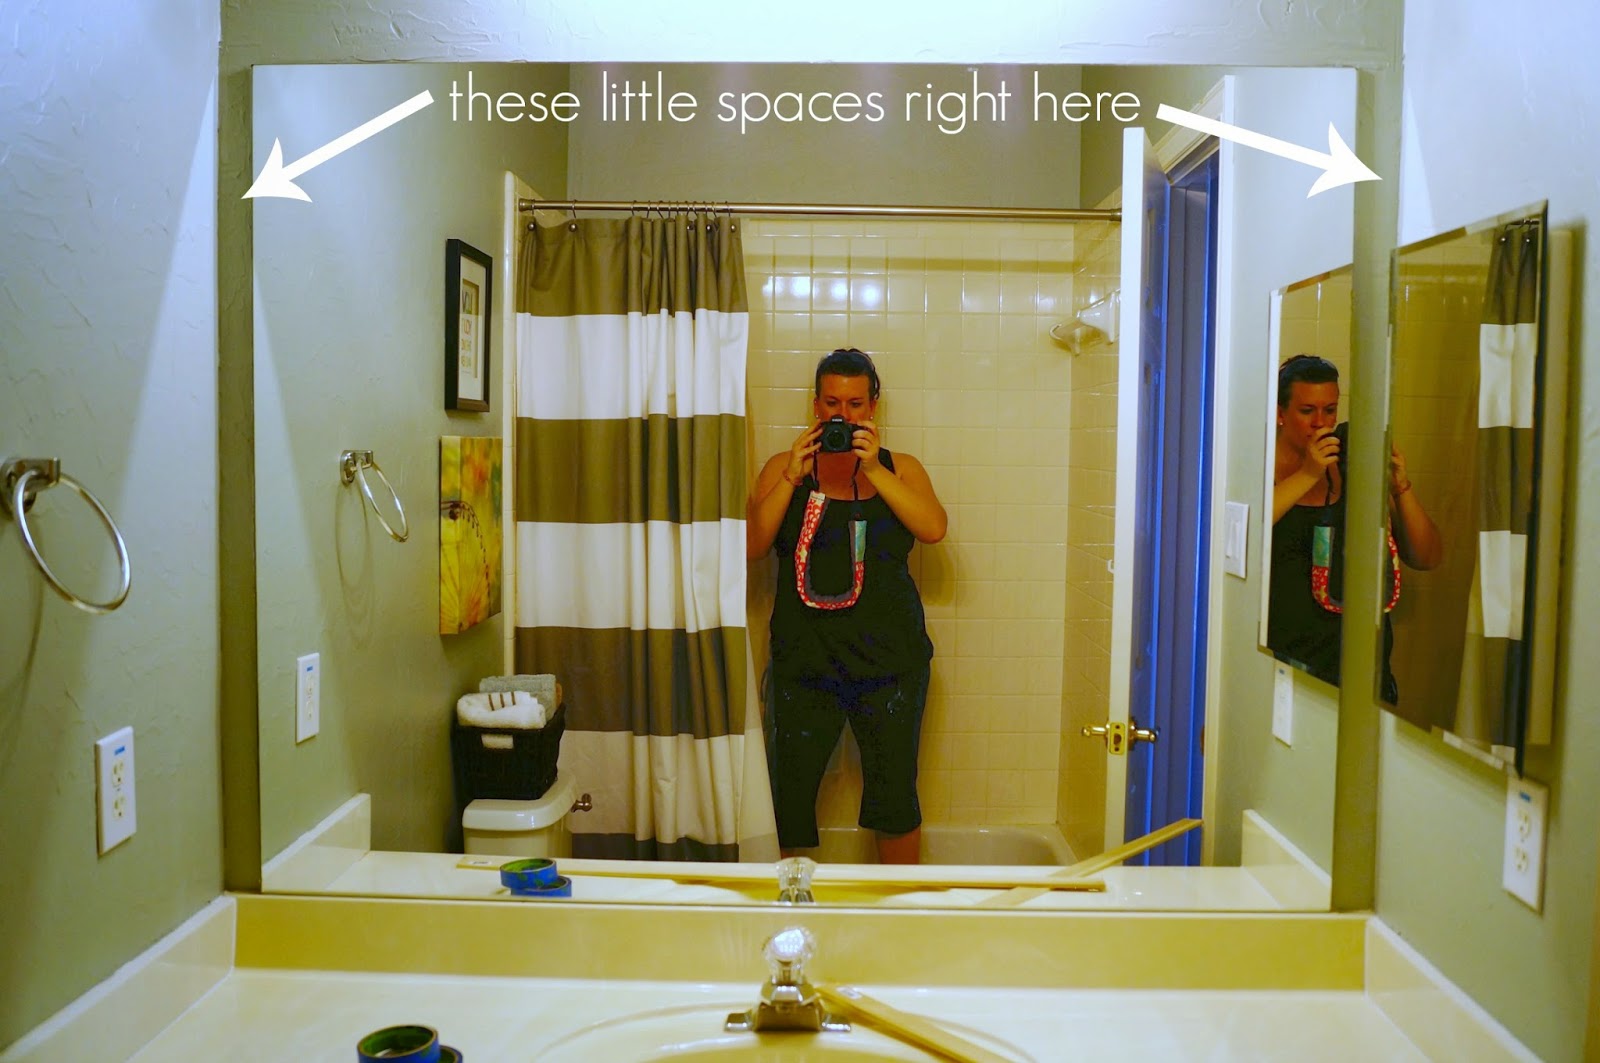
The tricky thing about our mirrors is they did NOT extend to the full width of the wall, unlike the vanity beneath it (see photo below). So I bought some 1/4" thick scrap/trim (the thickness of the mirrors), and cut them to fit in the gaps between the mirror and the wall (about a three inch space). You can see the pieces laying on the counter in the photo. I attached them to the wall with some screws and liquid nails. This way, the frames had a solid surface to adhere to outside the edge of the mirror, without wobbling, because I wanted the frames to extend the full width of the wall and make the mirrors look that big. My trim was wide enough that it could touch the edge of the wall and still have a good overlap on the mirror. Hopefully if you're doing this project you don't have to deal with this. If you do, just leave any questions in the comments section below.

I used some white paint I already had to paint the pieces before they were cut and applied to the mirror. We measured carefully, cut, and applied them with liquid nails, then held them in place with some painter's tape while the adhesive set up. Although the tube of liquid nails says it dries fairly quickly, I opted to leave the tape holding everything together for the rest of the afternoon and overnight, just to make sure everything was set.
Alsoooo... fortunately for us, the mirrors weren't being held up with any type of brackets whatsoever, they were just glued onto the wall. Therefore, I had a completely flat surface and didn't have to work around any extra hardware. Not everyone is this lucky. If you're among the unlucky ones, my advice would be to use a drimmel tool to carve out little notches in the back of your trim pieces where the brackets can sit nicely inside them and your trim can be flush against the mirror/wall. There are also tutorials for this online.
Now all that's left to do is caulk the seams and the inner edges where the trim meets the mirror, then touch up with paint. Easy peasy! I decided to wait until everything was completely dry and set up before applying the caulk.
This is a super simple, cheap, and easy upgrade that can add major bang for your buck to your home, and give your bathrooms a beautiful custom look. You don't even have to be a pro to do it. Now I'm itching to replace the fixtures in these rooms to update them even more! Just add that to the list...
Here's one more before & after for the road. Have an awesome weekend, and come back Monday for an art lesson you won't want to miss!


No comments:
Post a Comment
Thanks for visiting my blog today!